Tour of the interface
This page is a reference map of the Viewer — what each region is and what lives there. Skim it once to know where things are; you don't need to memorize anything.
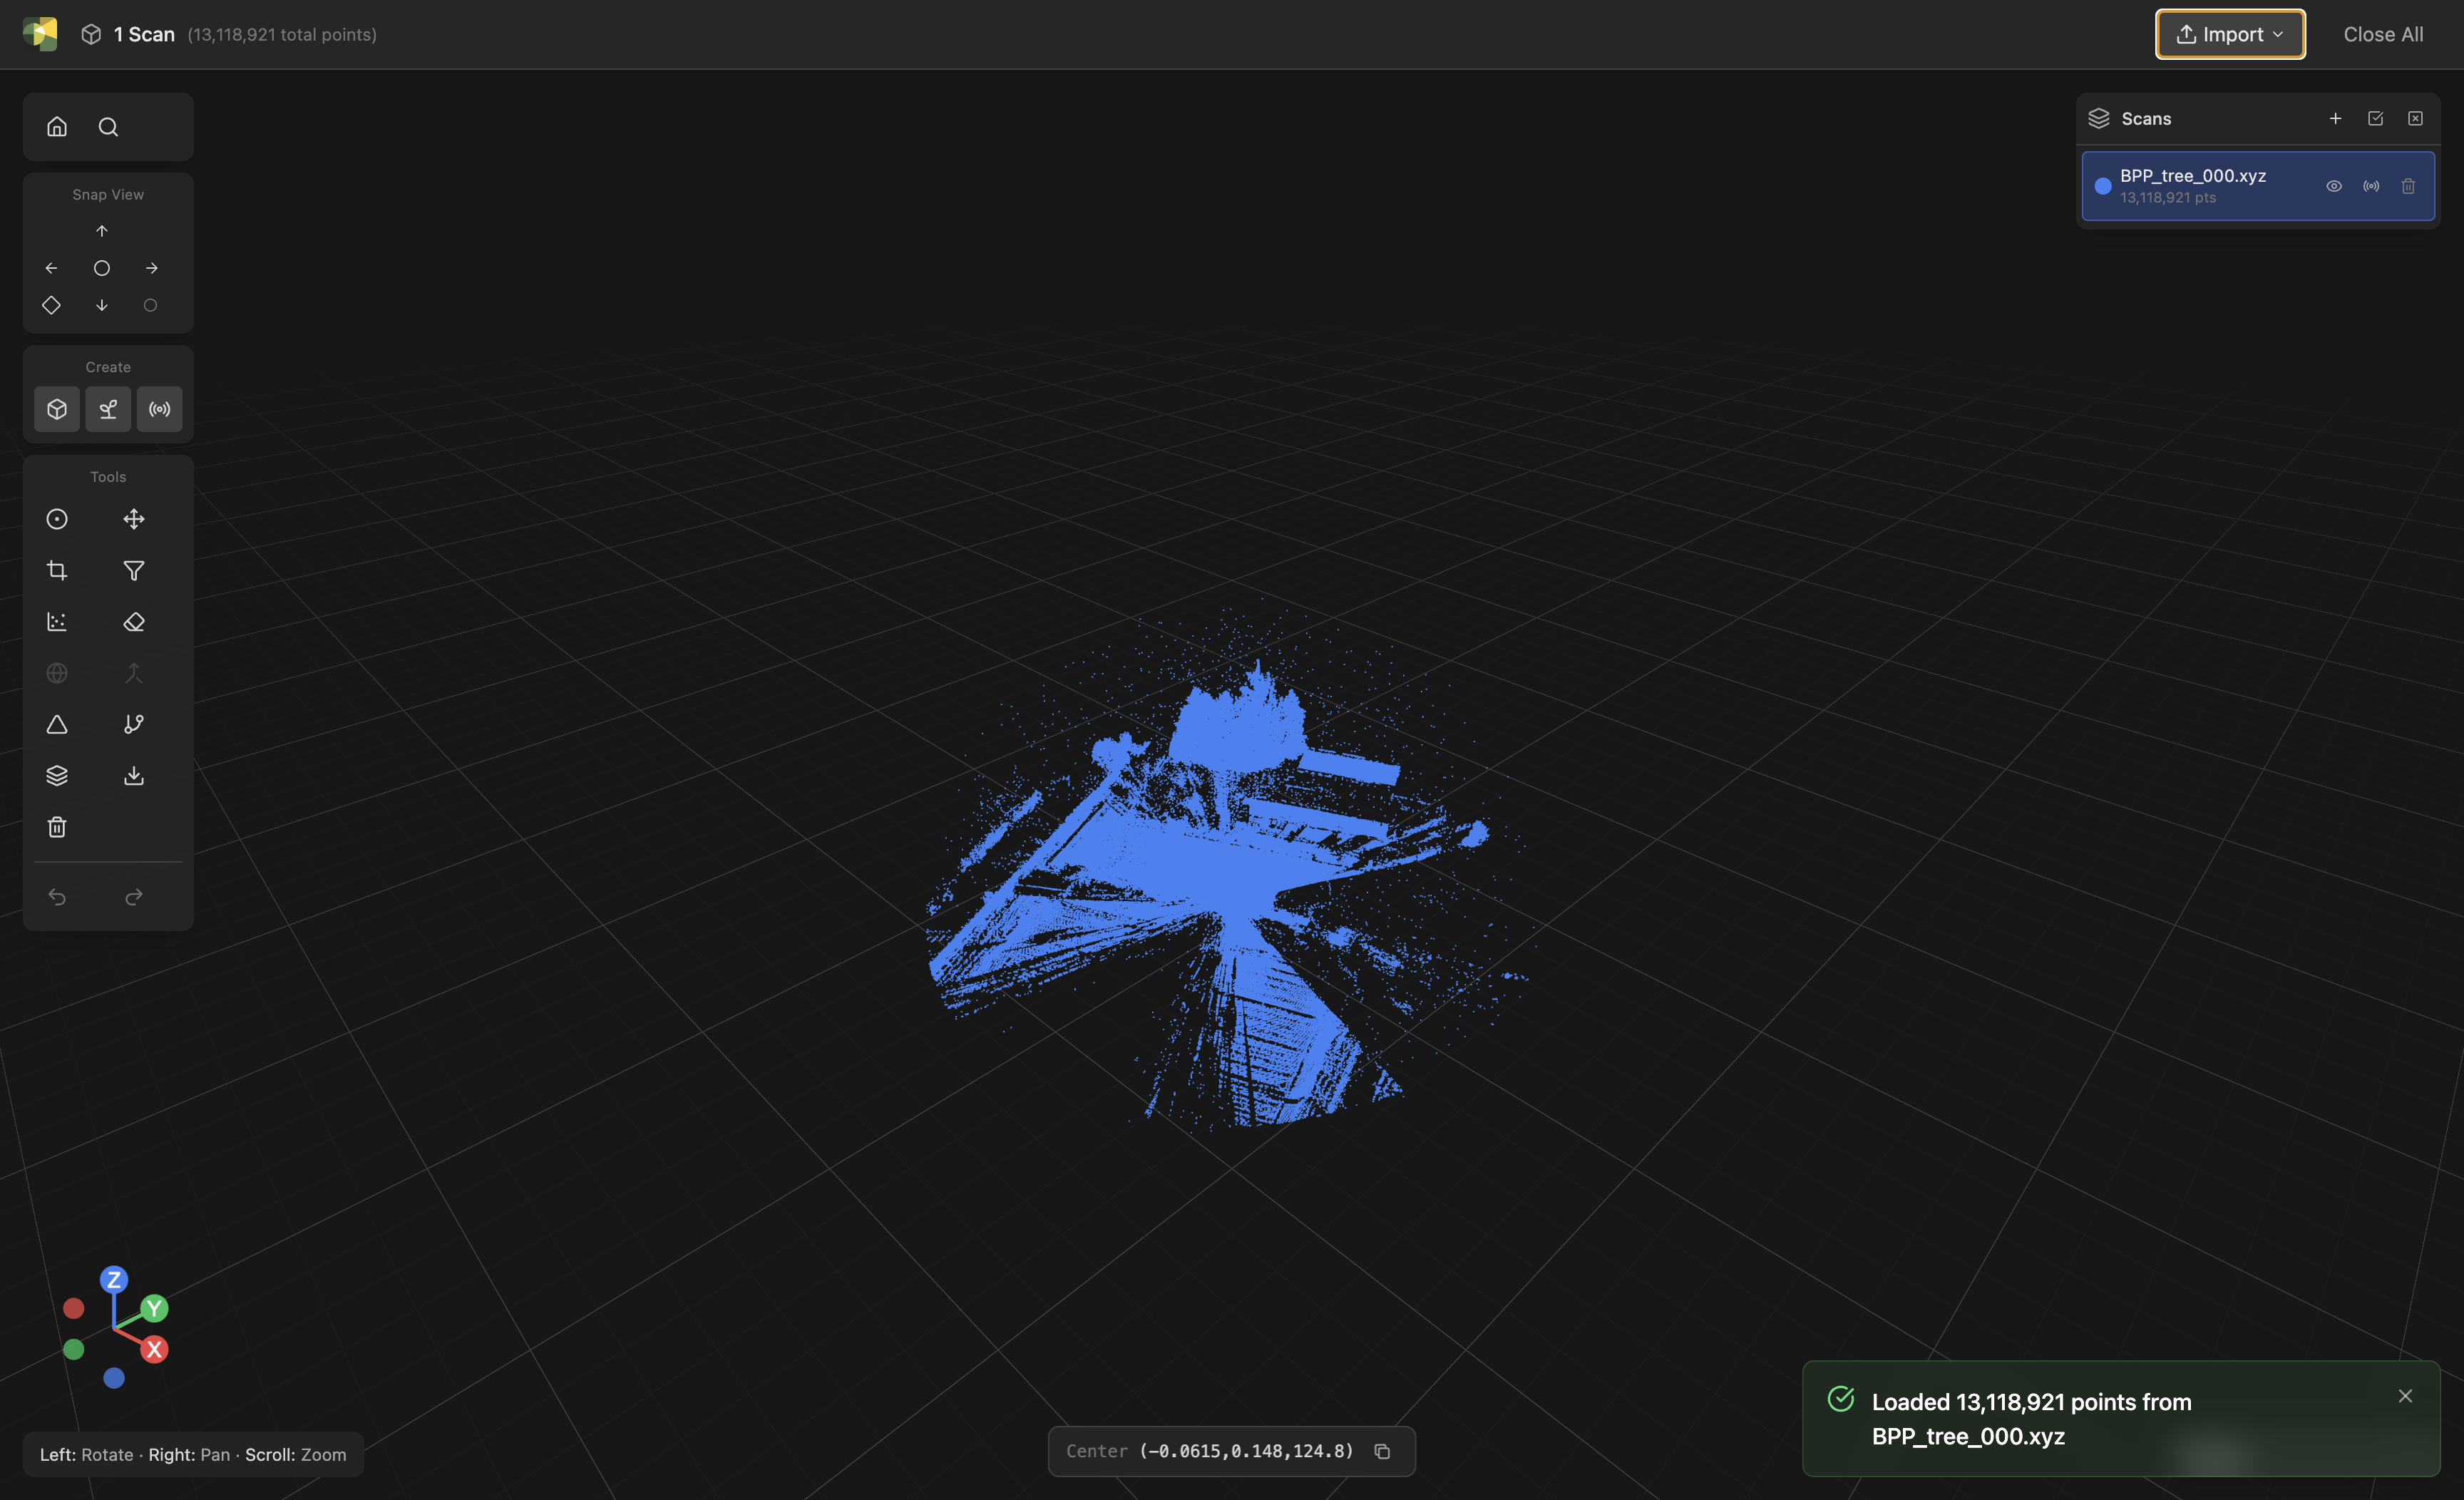
Top bar
| Region | What's there |
|---|---|
| Top-left | Phytograph logo and the current scene summary ("N Clouds, M Meshes…") |
| Top-center | The active mode label |
| Top-right | Report a Bug and Request a Feature buttons (see Reporting bugs & requesting features) |
Import is via drag-and-drop onto the window or the File → Import
menu — choose Auto-detect, or an explicit Point Cloud, Mesh,
or Skeleton when auto-detection picks the wrong type for an ambiguous
format like .ply. To remove scans, select them in the Scans panel
and delete.
File → New (⌘/Ctrl+N) clears everything — all point clouds, meshes, skeletons, plant models, scans, and analysis results — and resets the app to a fresh start, the same as relaunching it. It asks for confirmation first because it can’t be undone.
Your session is not saved anywhere
Phytograph has no project file. Everything you load or create lives in memory for as long as the app is open, and every edit you make after import — crop, erase, filter, bake, segment, label — exists only there. Closing the window or quitting discards all of it.
Because of that, closing with anything loaded asks you to confirm first, and defaults to Cancel so a stray click or keypress can’t throw the session away. Choose Discard and Close only when you really are finished. To keep results, export them before you close.
Left tool column
A vertical column down the left side. At the top are the view controls (command-palette search, Set Scene Origin — the rotation pivot — and Pick & Measure, which labels individual points with their coordinates and attributes, and measures distances, path lengths and angles between them) and the snap-view gizmo. Below those are two always-visible blocks — Create and Tools:
| Block | Buttons |
|---|---|
| Create (build the scene) | Generate Plant, Import Model, Create Voxel Grid, Create Plane, Add Scan |
| Tools › Pre-processing | Transform, Crop, Erase, Filter, Resample, Move to Origin, Backfill Misses, Align (ICP), Stitch |
| Tools › Segmentation | Segment Ground, Segment Wood / Leaf, Segment Trees |
| Tools › Reconstruction | Triangulate, Generate DEM, Extract Skeleton, Build QSM, Leaf Area Density, Fit Crown & Metrics |
Create is kept separate from Tools on purpose: Create builds a scene (generating geometry, placing scanners), whereas Tools operate on data you already have. The Tools block holds only the three analysis stages of a typical pipeline. Synthetic scanning (Simulate) has no left-column block of its own — run it from the Simulate menu (Run Synthetic Scan) or the Run Synthetic LiDAR Scan button at the top of the Scans panel once a scanner is placed.
Hover any button to see its name. Buttons no longer appear and disappear with your selection — they're always shown so you can see what's available.
- Single-input tools (Filter, Segment Ground, Triangulate, …) act on the selected cloud. They're grayed out until you select one; the tooltip tells you what to pick.
- Multi-input tools (Align, Stitch, Leaf Area Density) stay enabled and open a dialog where you pick their inputs explicitly — for example, Leaf Area Density lets you choose the scans and the voxel grid. If a needed input doesn't exist yet, the dialog tells you.
Everything in these blocks is also in the menu bar — under the Tools, Create, and Simulate menus, grouped the same way — and in the command palette.
The same operation can often be reached from a tool's results, too — running a Helios triangulation, for instance, defines the voxel grid that the Leaf Area Density dialog then reuses automatically.
Bottom-left view gizmo
A small XYZ orientation gizmo and a row of view-snapping buttons: Left, Right, Front, Back, Top, Bottom, plus Isometric. Click any button to rotate the camera to that view — it only reorients (Z stays up), keeping your current target and zoom rather than reframing. The gizmo tracks the current orientation; clicking one of its axis heads does the same thing. After snapping you can still orbit freely. To reframe, use Reset View (fit all) or Zoom to Selection.
3D canvas
The main interactive area. Camera controls:
| Action | Mouse | Trackpad |
|---|---|---|
| Orbit | Left-click drag | One-finger drag |
| Pan | Right-click drag, or ⌘/Ctrl + left-click drag | Two-finger drag |
| Zoom | Scroll wheel | Pinch |
| Zoom to selection | F (or the Zoom to Selection toolbar button) | Same |
Orbiting turns the view about the scene origin (the red-and-white ring marker, which starts laterally centered on your loaded content at ground level, and can be dragged elsewhere) — panning does not move that pivot. Zooming is independent of the origin: the scroll wheel flies the camera toward whatever is under your mouse cursor, so anything you can see, you can zoom to. See Viewer navigation.
A reference grid on the world XY plane gives you a sense of scale. It adapts as you zoom: the cell size steps through round values (…10 cm, 20 cm, 50 cm, 1 m, 2 m, 5 m…) so cells stay legible instead of packing together, with a heavier line every fifth cell.
Labels dropped by the Pick & Measure tool also live here: each one is a small bubble tethered by a dashed leader line to the point it describes, and it stays pinned to that point as you orbit. Measurements appear the same way, with the measured line drawn through the cloud. See Inspect a point and Measure distances and angles.
Right-side scene panel
Three stacked lists — Scans, Meshes, Skeletons. Each scan entry shows:
- an expand chevron on the left that reveals the scan's details
- a color dot (also acts as a selection indicator); click it to pick a custom per-scan color, which drives the Per-scan color mode
- the scan label and a subtitle (point count, scanner origin, or both)
- a registered marker beside the label if Auto-Register moved this scan, or reference if other scans were registered onto it (a reference scan is never moved)
- visibility, duplicate, and remove controls
- a paperclip to attach point data (if the scan only has parameters)
- a radio icon to add scan parameters (if the scan only has data)
Expanding a scan shows whatever that scan actually carries:
- Scan parameters, when it has them — scanner model, origin (or trajectory summary for a moving scan), pattern and grid size, angular sweep, tilt, and heading, plus the return type detected from its data.
- Cloud details, when it has point data — the point count (flagged when there are unapplied edits, and noting whether the scan carries sky/miss returns), the extent in meters, the global shift applied at import if any, the source file it was read from, and — for a registered scan — which scan it was registered onto and how far it moved (or, for a reference scan, which scans were registered onto it).
- Fields — every scalar column the cloud actually carries. LAS schema dimensions that are present but entirely zero (because the source file never had them) are listed separately on an empty line, so they don't bury the columns you really imported.
That last line is worth knowing about: it is the direct answer to "what
did my import produce?". The Color by dropdown is a lossy substitute,
since it hides intensity, the LAS built-in dimensions, and any column
whose values are all the same — so a column that was silently dropped
looks identical there to one that came through fine. A plain .laz /
.txt / .xyz import has no scan parameters, but it still expands to
show these last two blocks.
The duplicate button (a copy icon) makes an independent copy of the
scan — its point data and any scan-parameter metadata — named
… (copy) (then … (copy 2), and so on). The copy is fully separate:
editing, cropping, or deleting one never affects the other. It's handy
for branching experiments — run two different crops or segmentations off
the same import, or place a second scanner with the same sweep settings.
(For a one-off non-destructive crop you don't need to duplicate first —
tick Keep original cloud in the crop panel instead.)
A scan can hold point data, scan parameters (origin, sweep, tilt), or both — see Scans for details.
Multi-select with Shift+click (range) or ⌘/Ctrl+click (toggle). Single-input tools (Filter, Segment, …) act on the current selection, so being deliberate about what's selected matters; multi-input tools (Stitch, Align, Leaf Area Density) seed their dialog from the selection but let you change it there.
Selecting meshes and QSMs in the viewport
Meshes and QSMs are also selectable directly in the 3D view. Click one to select it; ⌘/Ctrl+click adds or removes it from a multi-selection. Selecting a mesh or QSM — whether in the viewport or in the Meshes / QSMs panel — draws a bright highlight outline around it in the 3D view and highlights its row in the panel, so the two stay in sync. A QSM's leaves count as part of it. Click an empty area to clear the selection. (Viewport selection pauses while an edit tool such as Crop, Erase, or Transform is active, since those clicks belong to the tool.)
Bulk show/hide and delete
Each list's header has an eye and a trash button that act on multiple entries at once:
- With one or more rows selected, they apply to just the selection — "hide the 3 selected scans", "delete the 2 selected meshes".
- With nothing selected, they apply to the whole list — hide or show every entry, or clear the list.
The eye button toggles to a single uniform state: if any target is visible it hides them all; press again to show them all. A bulk delete asks for confirmation once for the whole batch, rather than once per entry. The same multi-select + header buttons work for Meshes, Skeletons, and QSM results.
The Scans and Meshes headers also carry a check and a cross button — Select All and Deselect All for that list. They are the fast way to set up a bulk action (select everything, then press the eye or the trash) and the fast way to clear a selection without hunting for empty space in the viewport. Each acts only on its own list, so selecting every mesh leaves the scan selection as it was.
The legend stack in the bottom-right shows one entry per pseudocolored object, each naming the geometry it describes and the variable it maps (e.g. Oak scan 3 → Z Height [m]). Objects sharing a mapping merge into one entry; past three entries the rest collapse into a clickable list. Clicking an entry's caption opens an inline colormap picker for that object. See Color modes.
Bottom status bar
Cursor world coordinates ("X, Y, Z"), the active modifier-state indicators (Left/Right/Scroll meanings depending on tool), and the last operation's status message (e.g., "Loaded 84,795 points from scan.xyz").
Opening the documentation
Open Help → Phytograph Documentation to open this documentation site in your web browser.
About / version info
Open Phytograph → About Phytograph (macOS) or Help → About Phytograph (Windows/Linux) to see the versions Phytograph is running: the Application and Backend versions, plus the PyHelios and Helios (C++) engine versions. These are handy to quote when reporting a bug — the same numbers are auto-attached to the bug/feature reports you send from within the app.
Checking for updates
Open Phytograph → Check for Updates… (macOS) or Help → Check for Updates… (Windows/Linux) to see whether a newer release is available. If you're already on the latest version, it tells you so.
Phytograph also checks automatically once each time it starts. Either way, it always asks before downloading — the installer is several hundred megabytes, so it never starts a large download on its own.
While the download runs, a progress pill appears at the top of the viewer, the same indicator used for other long-running operations. The download continues in the background; you can keep working.
Once it finishes, Phytograph asks whether to restart. If you have work open, it then asks a second time whether to discard the session, because installing the update closes the app and nothing in a Phytograph session is saved automatically. Declining that prompt cancels the install and leaves the app exactly as it was — the download is kept, and it installs the next time you quit normally. Choosing Restart now closes the app, installs the update, and reopens it. The pill switches to Restarting to install the update… first, and on macOS it stays up for several seconds while the new version is unpacked before the window closes — that pause is normal. The window is then gone for up to a minute. Choosing Later keeps the downloaded update and installs it the next time you quit.
Command palette
Press ⌘+K (macOS) or Ctrl+K (Windows) anywhere in the Viewer to open a searchable list of commands.
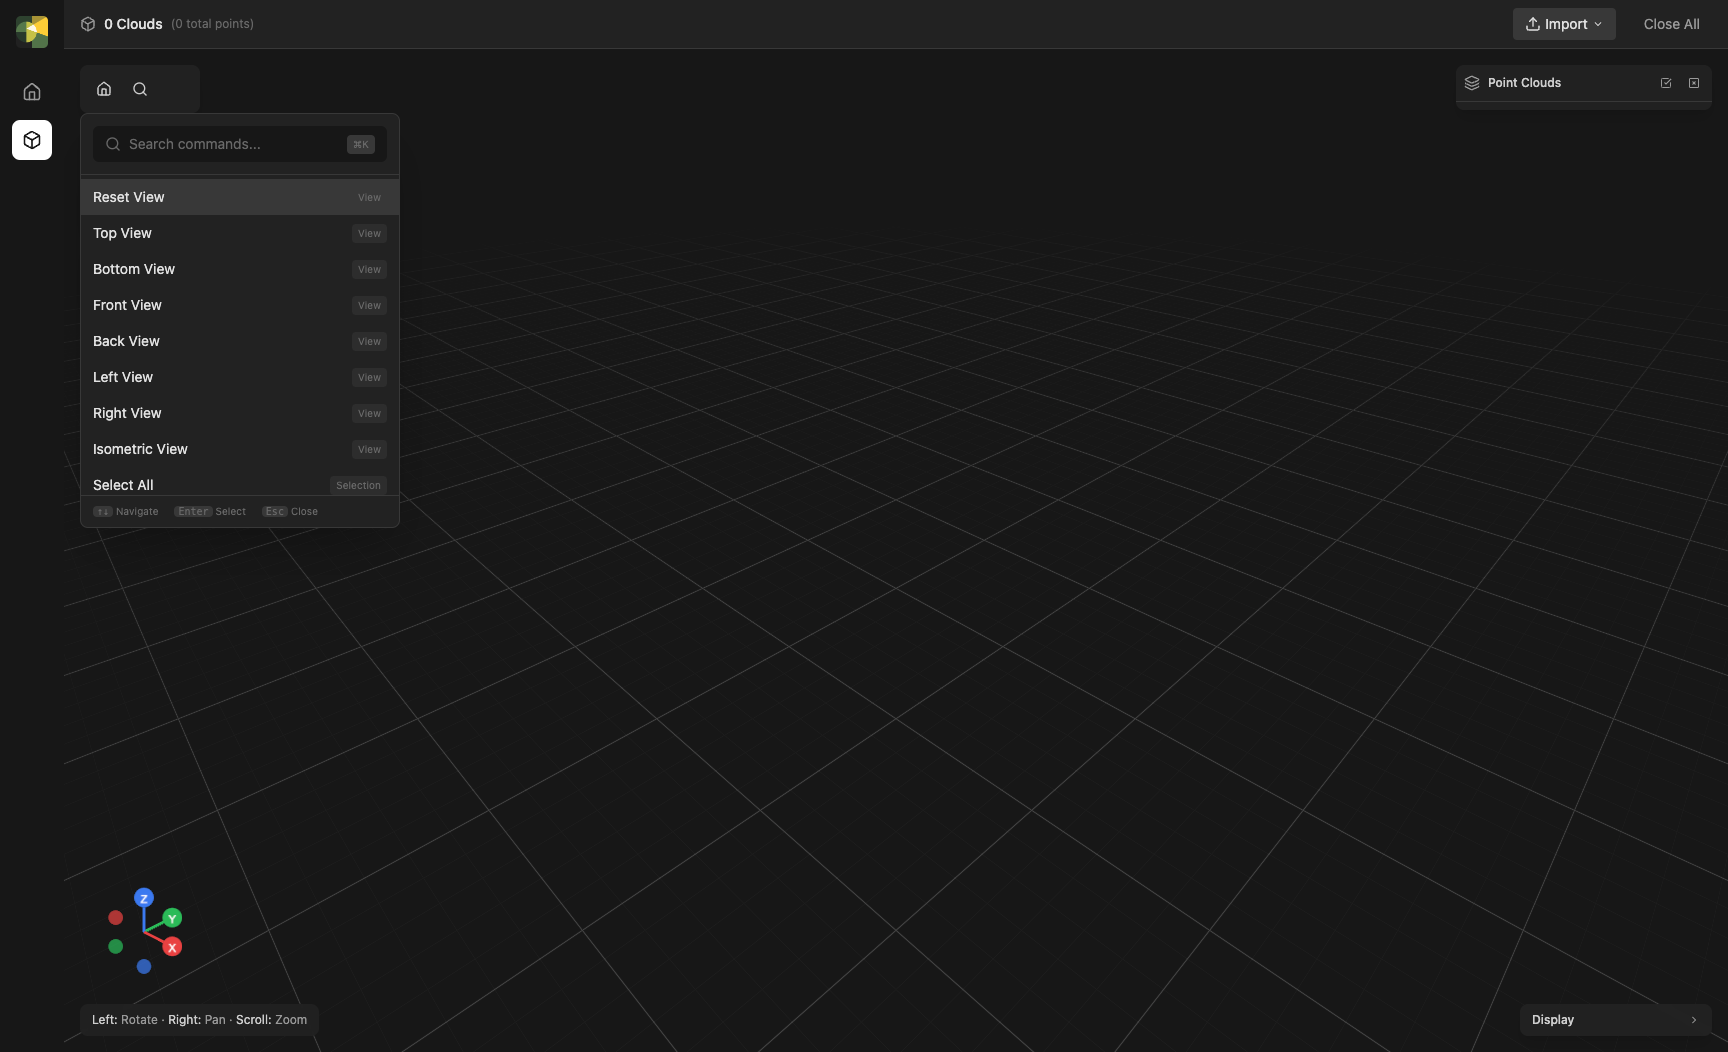
The palette is the fastest way to find a feature when you don't remember which button hides it. Start typing to filter; press Enter to run the highlighted command, Esc to close.
Undo / redo
⌘/Ctrl+Z undoes the last edit; ⌘/Ctrl+Y or ⌘/Ctrl+Shift+Z redoes it. Undo covers the whole scene: adding objects (import, triangulate, generate plant, extract skeleton, build QSM, compute LAD), deleting them, transforms (move/rotate/scale), pre-bake erase/crop edits, stitching, and renaming/recoloring. Deleting several selected objects undoes in a single step. View settings (visibility, color mode, point size, camera) are not undoable. A few destructive operations that rewrite point data or recreate a backend session — baking edits, segmentation, ICP registration, and plant morph/age changes — are one-way: instead of being reversible they clear the undo history for the affected object.
What's next
Pick a workflow that matches what you want to do: